How to Safely Add a Roof Overhang: Essential Tips for Your DIY Project
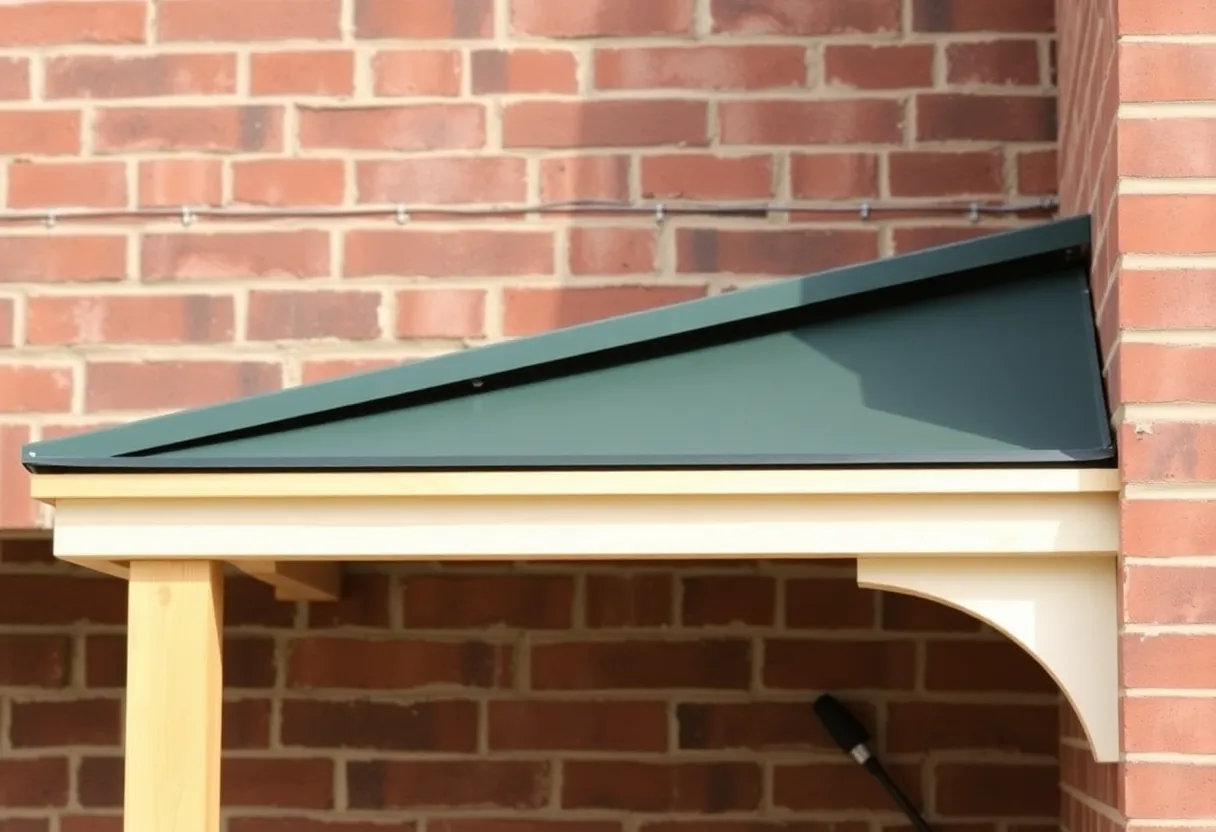
Adding a roof overhang can enhance the aesthetic appeal of your home while providing essential protection from the elements. However, undertaking a DIY project like this requires careful planning and adherence to safety protocols. Below are essential tips to guide you through the process of adding a roof overhang safely.
Understanding the Purpose of a Roof Overhang
A roof overhang serves several critical functions:
- Protection from Water Damage: Overhangs help divert rainwater away from the walls, preventing water damage and reducing the risk of mold growth.
- Energy Efficiency: By blocking direct sunlight during hotter months, an overhang can keep your home cooler, thus reducing air conditioning costs.
- Aesthetic Appeal: An overhang can add character and dimension to your home, enhancing its architectural features.
Planning Your Roof Overhang
Before you begin construction, thorough planning is essential to ensure the project runs smoothly. Here are some factors to consider:
1. Assess Your Current Roof Structure
Evaluate the existing roof’s condition and design. Determine if it can accommodate the added weight and structure of an overhang. Look for any signs of damage, rot, or structural issues.
2. Select the Type of Overhang
There are various styles of roof overhangs, including:
- Open Overhangs: These are exposed rafters that allow ventilation and create a rustic, unfinished look.
- Closed Overhangs: These use soffits to cover the underside, providing a cleaner appearance.
Your choice will impact the overall design and functionality of the overhang. Consider aesthetics and practicality when making this decision.
3. Measure and Design
Accurate measurements are crucial. Use a measuring tape to determine the extent of the overhang you want to add. Document your design, including dimensions, materials, and any necessary calculations for weight distribution.
Gathering Materials and Tools
Once the planning stage is complete, collect all the necessary materials and tools. Common items required for adding an overhang might include:
- Wood: Typically, treated lumber or plywood will be needed.
- Fasteners: Nails, screws, and brackets to secure the new structure.
- Tools: A saw, measuring tape, level, hammer, and safety gear including goggles and gloves.
Safety Precautions
Safety cannot be overstated when working on any DIY project. Follow these essential safety practices:
1. Wear Appropriate Safety Gear
Protective glasses, gloves, and a helmet are vital to safeguard against falling debris or hazardous materials.
2. Work with a Partner
Many tasks, especially those involving ladders, are easier and safer with a partner. They can help stabilize materials and provide assistance during the installation.
3. Use Proper Ladder Safety
Ensure your ladder is stable and positioned correctly. Always maintain three points of contact when climbing.
Installing the Roof Overhang
Once you’re adequately prepared, you can begin the installation process. Follow a step-by-step approach to ensure a successful build.
1. Remove Any Existing Structures (if applicable)
If you are modifying an existing roof, carefully remove any old overhang materials before starting. This may include trimming back the soffit or fascia boards.
2. Install Support Beams
Begin by attaching support beams to the existing roof structure. Use brackets and screws to secure these beams, ensuring they are level and can adequately bear the additional weight.
3. Attach Roof Rafters
Cut rafters to size based on your design measurements. Attach the rafters to the support beams, ensuring each is securely fastened.
4. Add Sheathing
Once the rafters are in place, install plywood or another type of sheathing over the rafters. This forms the surface of the overhang and provides support for the roofing material.
5. Install Roofing Material
Choose roofing material that matches or complements your existing roof. Install shingles, tiles, or metal roofing according to the manufacturer’s guidelines.
Finishing Touches
After the roof overhang is installed, consider these finishing steps:
1. Add Soffits and Fascia
Install soffits to cover the underside of the overhang, if you chose that style. This not only improves aesthetics but also enhances ventilation.
2. Paint or Stain
To prolong the life of the materials used, consider painting or staining the new overhang. This adds an extra layer of weather resistance.
3. Clean Up the Worksite
After completing the installation, clean up debris and tools from your work area. This step is crucial for safety and helps you take stock of your materials and tools.
Post-Installation Inspection
After completing your project, it is essential to conduct a thorough inspection:
1. Check for Structural Integrity
Ensure all elements are securely fastened, and there are no visible signs of sagging or misalignment.
2. Monitor for Water Leakage
During the first heavy rain or snow, inspect the overhang for leaks or water intrusion. Early detection can prevent more extensive damage.
3. Regular Maintenance
Periodically check your overhang for any signs of deterioration or wear. Regular maintenance will extend its life and retain its effectiveness.
Conclusion
Adding a roof overhang can be a rewarding DIY project that enhances your home’s functionality and appearance. By following these essential tips, you can ensure the process is safe and successful. Proper planning, gathering the right materials, and adhering to safety precautions are keys to achieving a satisfactory and durable roof overhang.
Investing time and effort into this project can yield both practical benefits and improved aesthetics for your home. Adhering to designated guidelines and maintaining diligence throughout the process will help ensure that your DIY roof overhang serves its intended purpose for years to come.
Author: STAFF HERE CLINTON
The CLINTON STAFF WRITER represents the experienced team at HEREClinton.com, your go-to source for actionable local news and information in Clinton, Laurens County, and beyond. Specializing in "news you can use," we cover essential topics like product reviews for personal and business needs, local business directories, politics, real estate trends, neighborhood insights, and state news affecting the area—with deep expertise drawn from years of dedicated reporting and strong community input, including local press releases and business updates. We deliver top reporting on high-value events such as the Festival of Discovery, Clinton Community Day, and performances at the Whitten Center Amphitheater. Our coverage extends to key organizations like the Clinton Area Chamber of Commerce and the Laurens County Historical Society, plus leading businesses in manufacturing and education that power the local economy such as Milliken & Company and Presbyterian College. As part of the broader HERE network, including HEREAiken.com, HEREBeaufort.com, HEREChapin.com, HERECharleston.com, HEREClinton.com, HEREColumbia.com, HEREGeorgetown.com, HEREGreenwood.com, HEREGreenville.com, HEREHiltonHead.com, HEREIrmo.com, HEREMyrtleBeach.com, HERENewberry.com, HERERockHill.com, and HERESpartanburg.com, we provide comprehensive, credible insights into South Carolina's dynamic landscape.


 Mays Contracting

